
Charcoal Grills & Smokers, Tips & Techniques
Reverse Sear Steak: The Complete Guide
Reverse sear means cooking the steak at a low temperature first (225-250°F) until it reaches 10-15°F below your target doneness, then searing it over high heat to build the crust. The result is a steak cooked evenly edge to edge with a thick, deeply browned crust – significantly better than the traditional sear-first method for thick cuts over 1.5 inches.
Why Reverse Sear Works Better
Traditional searing (high heat first, then finish in the oven) works well for thin steaks. For anything over 1.5 inches thick, it has a fundamental problem: the crust forms before the center reaches temperature, and the outer layers overshoot by the time the center is done – producing a grey band of overcooked meat beneath the crust.
Reverse sear eliminates this problem:
- The low-heat phase cooks the steak evenly from edge to edge – the center rises to temperature at the same rate as the outer layers, producing no grey band.
- When the steak reaches the searing phase, the surface is already warm and dry. A dry surface sears faster and produces a thicker, more even crust than a surface coming straight from the fridge.
- The low-heat phase acts as a resting period – the meat is already relaxed when it hits the sear, which means juices stay where they are rather than rushing out.
For thick cuts – ribeye, tomahawk, New York strip over 1.5 inches – reverse sear consistently produces better results than any other method.
Best Cuts for Reverse Sear
| Cut | Ideal thickness | Notes |
|---|---|---|
| Ribeye | 1.5-2 inches | The best cut for reverse sear – marbling bastes itself during the low-heat phase |
| Tomahawk | 2-3 inches | Bone adds visual drama. Same technique as ribeye. Allow extra time in the low-heat phase. |
| New York strip | 1.5-2 inches | Less marbling than ribeye – season well and baste with butter during the sear |
| T-bone / porterhouse | 1.5-2 inches | Two muscles cook at slightly different rates – the fillet section cooks faster than the sirloin. Monitor both. |
| Filet mignon | 1.5-2 inches | Very tender, lean – benefits enormously from the even cooking of the reverse sear. Easy to overcook on a traditional approach. |
The reverse sear technique is designed for thick cuts (1.5 inches minimum). For steaks under 1 inch, a standard high-heat sear on each side produces better results – the reverse sear low-heat phase takes longer than the thin steak needs.
What You Need
- A thick steak – 1.5 to 2 inches minimum
- A smoker, pellet grill, or oven for the low-heat phase (225°F)
- A cast iron skillet, flat top griddle, or charcoal grill for the high-heat sear
- A reliable instant-read meat thermometer – non-negotiable for this technique
- Kosher salt and black pepper – season 24-48 hours ahead for best results
- Butter, garlic, and fresh thyme or rosemary for basting during the sear
- A wire rack set inside a baking tray - for resting the steak in the low-heat phase
Doneness Temperature Guide
Pull the steak from the low-heat phase 10-15°F below your target. The sear adds approximately 10-15°F to the final temperature.
| Doneness | Pull temp (low & slow) | Final temp after sear | Description |
|---|---|---|---|
| Rare | 105-110°F | 120-125°F | Cool red center, very soft |
| Medium rare | 115-120°F | 130-135°F | Warm red center, tender and juicy – optimal for most cuts |
| Medium | 125-130°F | 140-145°F | Pink center, slightly firmer |
| Medium well | 135-140°F | 150-155°F | Slightly pink, noticeably firmer |
| Well done | 145-150°F | 160°F+ | No pink, fully cooked through |
Medium rare (130-135°F) is the optimal temperature for most cuts – the fat has rendered enough to carry flavor, and the texture is at its most tender. For ribeye and tomahawk specifically, medium rare is the standard.
Step by Step: Reverse Sear on a Pellet Grill or Smoker
Step 1: Season the steak
- Pat the steak completely dry with paper towels.
- Season generously with kosher salt and black pepper on all sides – including the edges.
- For best results, season 24-48 hours ahead and leave uncovered in the fridge. The surface dries out further (accelerating the Maillard reaction during the sear), and the salt penetrates deeper into the meat.
- If seasoning same-day, leave at room temperature for 45-60 minutes before cooking.
Step 2: The low-heat phase

- Set the Oakford 36A pellet grill or Oakford Outpost 29 offset smoker to 225°F. If using the pellet grill, hickory or oak pellets add a light smoke character to the steak.
- Place the steak on a wire rack. The rack allows airflow under the steak for even cooking.
- Insert a meat thermometer probe into the thickest part of the steak.
- Cook until the steak reaches 10-15°F below your target doneness – approximately 45-60 minutes for a 1.5-inch ribeye, 60-80 minutes for a 2-inch or thicker cut.
- Remove and rest for 10 minutes while the searing surface comes to temperature. Do not skip this rest – it lets the surface dry and cool slightly, which accelerates crust formation in the sear.
Step 3: The sear

- Preheat a cast iron skillet, flat top griddle (Daytona), or charcoal grill to maximum heat – 500°F+ on the surface. This is the most important variable in the sear. An insufficiently hot surface produces a mediocre crust.
- Add a high smoke-point oil (avocado or canola) – just enough to coat the surface.
- Place the steak on the screaming hot surface. Do not move it for 60-90 seconds.
- Flip. Sear the second side for 60-90 seconds.
- Stand the steak on its edges and sear the sides – 30 seconds per edge. This is often skipped but makes a significant difference to the overall crust.
- Add butter, crushed garlic, and a sprig of thyme or rosemary to the pan. Tilt the pan slightly and baste the steak continuously with the melting butter for 30-60 seconds.
- Check the internal temperature with the instant-read thermometer. The sear should have added 10-15°F; the steak should now be at your target doneness.
Step 4: Rest and slice
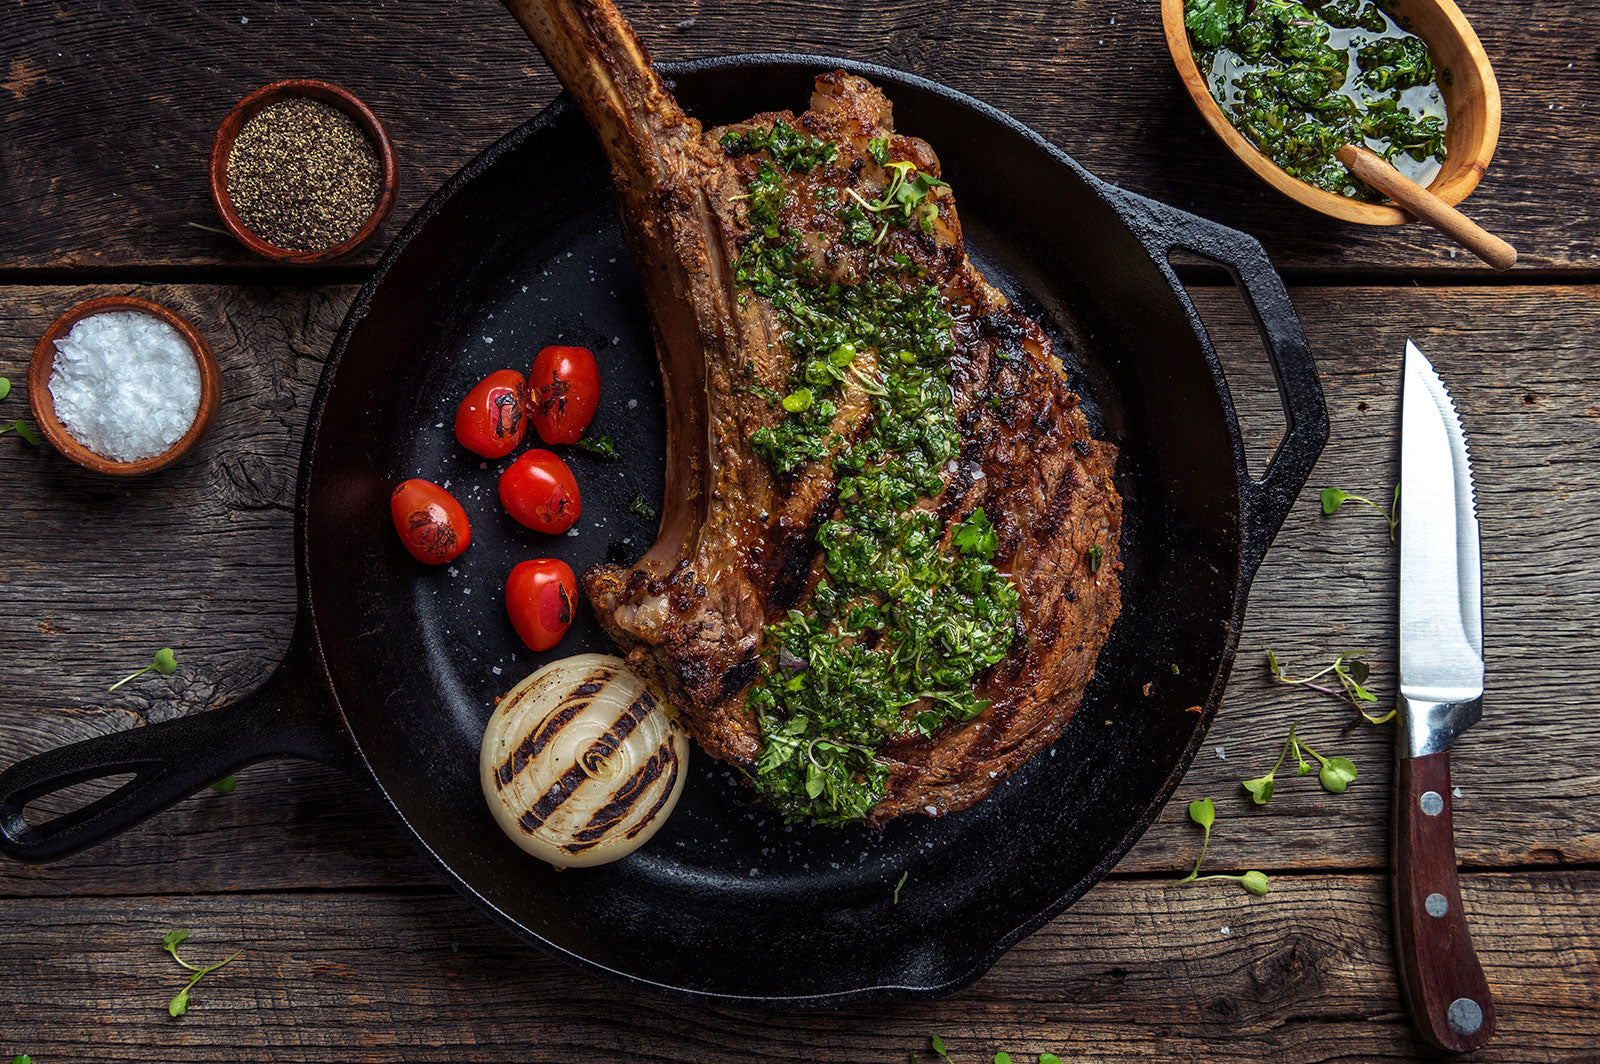
- Rest the steak for 5 minutes after the sear. This is a shorter rest than a traditionally cooked steak needs – the steak has already rested through the low-heat phase and the transition period.
- Slice against the grain and serve immediately.
Reverse Sear on a Charcoal Grill
The two-zone charcoal setup is an excellent platform for the reverse sear – the offset zone provides the low-heat phase, and the direct zone provides the sear.
- Set up a two-zone fire: place all the coals on one side of the grill (direct heat/searing zone), and leave the other side empty (indirect/low-heat zone).
- Place the steak on the indirect zone with the lid on. The indirect zone runs at 225-275°F when the vents are partially closed.
- Cook until 10-15°F below target doneness, monitoring with a thermometer.
- When ready, move the steak directly over the coals and sear for 60-90 seconds per side. With a charcoal fire, the sear is extremely fast – don't walk away.
- Baste with butter, rest 5 minutes, slice and serve.
The charcoal sear produces the most intense crust of all methods – the combination of radiant heat from the coals and the airflow over the surface creates results that a gas grill or flat top cannot fully replicate.
Common Mistakes
- Skipping the dry surface before the sear – a wet surface steams rather than sears. The pre-sear rest period dries the surface. If the steak looks wet when it comes off the low-heat phase, pat dry with paper towels before it hits the hot surface.
- Insufficient searing temperature – the crust forms from the Maillard reaction, which requires surface temperatures above 300°F. A properly preheated cast iron or griddle surface should sear the steak in 60-90 seconds per side. If it takes 3-4 minutes, the surface is not hot enough.
- Over-searing – the steak is already at temperature when it hits the sear. 60-90 seconds per side is enough. Every extra second pushes the internal temperature higher.
- Not using a thermometer – the reverse sear relies on precise temperature management. Do not estimate by touch or time alone.
- Cutting immediately after the sear – the short 5-minute rest matters even though the steak has already rested once. The sear creates surface tension that releases quickly. Cut too soon and the juices run.
Related Guides
Frequently Asked Questions
What is the reverse sear method for steak?
Reverse sear means cooking the steak at a low temperature first (225°F in a smoker, pellet grill, or oven) until it reaches 10-15°F below the target doneness, then searing it over maximum heat to build the crust. This produces an evenly cooked steak edge to edge with no grey band of overcooked meat beneath the crust – the main limitation of the traditional sear-first method on thick cuts.
What temperature do you reverse sear a steak?
Low-heat phase: 225-250°F. Pull the steak from the low-heat phase when it reaches 10-15°F below your target. For medium rare (130-135°F final), pull at 115-120°F. Searing phase: maximum heat - 500°F+ on the surface. The sear adds approximately 10-15°F to the internal temperature, bringing it to the target doneness.
How long does it take to reverse sear a steak?
The low-heat phase takes 45-60 minutes for a 1.5-inch steak and 60-80 minutes for a 2-inch steak at 225°F. Add a 10-minute pre-sear rest and 3-4 minutes of searing, for a total of 60-90 minutes. The trade-off for the extra time is significantly better results on thick cuts – more even cooking and a superior crust.
Is reverse sear better than regular sear?
For thick steaks (1.5 inches or more): yes. The reverse sear produces more even edge-to-edge cooking, a thicker, more consistent crust, and no post-sear resting time. For thinner steaks under 1 inch: the standard high-heat sear produces comparable results and is faster.
Can you reverse sear on a pellet grill?
Yes – and it produces excellent results. The Oakford 36A pellet grill at 225°F provides a stable, low-heat environment for the first phase, and hickory or oak pellets add a light smoke character to the steak. Follow up with a sear in a cast-iron skillet, flat-top griddle (Daytona), or charcoal grill over high heat.
